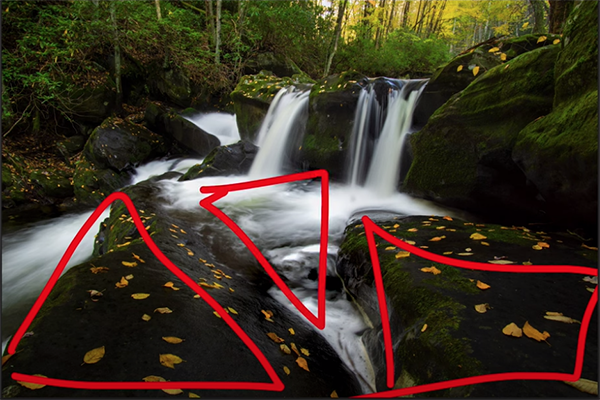
Here’s something that occurs all too often when composing images in the field: We tend to ignore what’s right in front of our face, and instead we concentrate on accentuating the midrange and background of a shot.
That’s unfortunate for a couple of reasons. First, what lies in the foreground may be the most compelling portion of the frame. And in other instances foreground elements can help direct a viewer’s eye to key areas that lie beyond. In this eye-opening tutorial from Landscape Photography University you’ll learn how framing a scene with the foreground in mind can make or break a shot.
Instructor David Johnston is a professional landscape shooter who says, “My passion is to provide the best tips and tools to level up the success of your photography.” He fulfills that goal today with several techniques for using foregrounds to make images more compelling.

Johnston uses a number of great images to illustrates his advice. The first example is a spectacular photo with colorful buildings and a striped lighthouse close to the camera and star trails in the nighttime sky. This shot illustrates Johnston’s claim that the first thing you want to be sure of is that your foregrounds point directly to the key subject.
In this instance Johnston’s key area of emphasis is a portion of the frame where the lighthouse meets the sky—specifically where the star trails track around the apex of the lighthouse. Thus, he composes the shot so the rooftops and chimneys of the buildings point toward the spot where these lines converge at the top of the lighthouse.
But what if a scene lacks the obvious benefits of the foreground in this particular shot? That’s where Johnston’s other images come into play. As he says, “even if you don’t have a solid foreground with a leading line or something else on the ground, you can still use elements within the landscape to point directly to what you want.”

When shooting landscapes with a wide-angle lens, Johnston says he typically looks for three areas of interest in his compositions—namely a foreground, midground, and a background. His second shot is far different from the first, but it still fulfills these criteria and you’ll see how uses the foreground in a creative way.
Johnston’s other images pose yet different challenges and solutions that rely upon sound strategies for incorporating foreground elements in various ways to maximize the impact of just about every landscape image he makes.
After watching the video be sure to visit Johnston’s instructional YouTube channel where there much more to learn.
We also recommend watching the tutorial we posted earlier from another accomplished pro who demonstrates how to add fog and mist to landscape photos for a unique, “atmospheric” effect.


