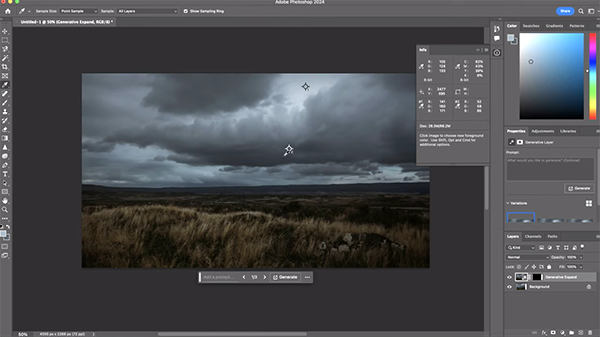
It’ a shame that many Photoshop users ignore the Eyedropper tool when editing their images to achieve precise colors with a natural look. After all, accurate tones are a critical element in just about every photo whether it’s captured indoors or put.
This instructional video comes from the folks at Adobe Photoshop Tutorials, a new YouTube channel dedicated to providing expert-guided tutorials for photographers and other creators interested in elevating their imaging skills. And the channel promises to deliver effective solutions that are accessible to beginners and experienced users alike.
This episode is devoted to Photoshop’s Eyedropper tool that, despite it’s power, takes less than two minutes to explain. In basic terms it enables you to quickly sample a color from anywhere within an image and add it to your Swatches panel. Then you can customize the tool’s settings to achieve the exact effect that you want.
When using the Eyedropper tool, the color swatch in the panel immediately changes accordingly. For added versatility, it’s possible to sample two different colors, simply by holding down Shift on your keyboard.

Once you determine the specific color(s) you desire you’ll notice some magic occurring in Photoshop’s Info panel: As you click around the image the panel automatically expands to display the RGB (Red, Green, Blue) settings for each color swatch selected. Then the panel’s color section reflects your changes as you move the Eyedropper tool without releasing the mouse button.
There’s an alternative method to the keyboard shortcut you’ll learn that involves employing Photoshop’s Brush tool while holding down the Option key on a Mac or the Alt key on a PC. This saves time by letting you seamlessly access the Eyedropper without switching between tools.
Today’s unnamed instructor provides this explanation: “With the Brush tool active, holding down Option or Alt provides quick access to the Eyedropper tool; simply click on a new color swatch and then release without returning to the Brush tool.” In other words, this quick process delivers very efficient color sampling for the task at hand.
You’ll immediately recognize the benefits of the Eyedropper tool after giving this a try, and you’ll definitely want to add this easy and efficient technique to your Photoshop workflow. You’ll also want to explore the Adobe Photoshop Tutorials YouTube channel, where there are more straightforward tips and techniques.
We also recommend watching another informative tutorial we posted recently, demonstrating a better way to sharpen photographs by using Photoshop’s oft-ignored High Pass Filter.


